Huawei
From EMUI 9, Huawei has added a new application called PowerGenie which will kill all apps unless it is whitelisted in PowerGenie app.
Follow the below steps to make changes in your phone settings. You might not find all the below-mentioned options on your mobile. You can safely ignore them if they are not available on your Huawei mobile.
Change 1:
- Go to phone Settings
- Select Advanced Settings.
- Tap on Battery Manager.
- Change the Power plan to Performance.
Change 2:
- Go to phone Settings.
- Select Advanced Settings.
- Open Battery Manager and tap on Protected apps.
- Set Notification History Log as Protected.
Change 3:
- Go to phone Settings
- Select Apps.
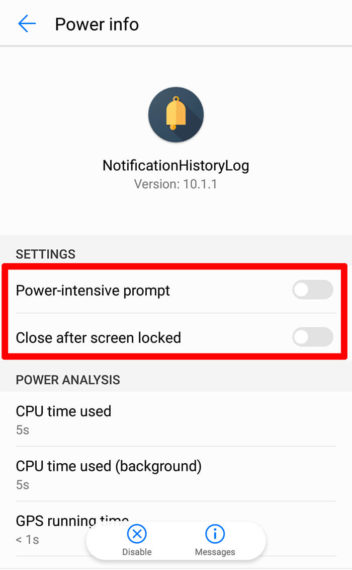
- Choose Notification History Log from the list.
- Tap on Battery.
- Disable Power-intensive prompt.
- Disable Close after screen locked.
- Enable Keep running after screen off (if available).
Change 4:
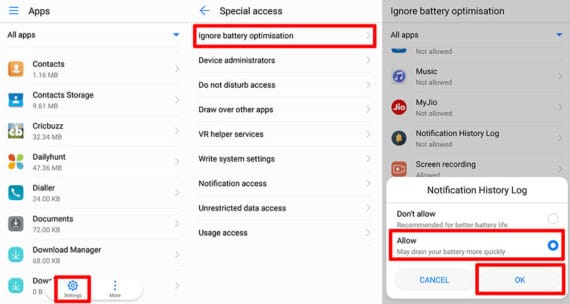
- Go to phone Settings
- Tap on Apps.
- Click Settings / Gear icon at the bottom.
- Under Advanced, select Special Access.
- Now click on Ignore battery optimization and change “Allowed” to “All apps”.
- Choose Notification History Log from the list and set it to Allow.
- Hit OK to confirm the changes.
Samsung
In the latest Samsung flagship devices, a new feature called Sleeping Apps is added. Apps that are included in this “Sleeping Apps” list will never run in the background. You need to first make sure Notification History Log is not added to “Sleeping Apps”.
Make the following changes in your Samsung device to stop Notification History Log from being killed automatically:
Change 1:
- Go to phone Settings.
- Open Device Care.
- Tap on Battery.
- Click on 3-vertical dots on the top right and select Settings.
- Here you need to disable
- Adaptive Battery
- Put unused apps to sleep
- Auto disable unused apps
- After disabling the above options, now click on Sleeping Apps.
- Click on the Trash icon on top-right to remove all applications from sleep.
Change 2:
On Samsung Galaxy S8, there is yet another feature called App Power Monitor which keep apps to sleep when not used for 3 continuous days. But there will be plenty of apps that work in the background to sync data, monitor notifications, alarms etc, which will not be opened every day but still need to function. In this case, you need to disable App Power Monitor as explained below.
- Open phone Settings
- Tap on Device maintenance.
- Select Battery.
- Disable App Power Monitor.
Change 3:
On other Samsung devices, follow the steps below to disable battery optimization:
- Go to phone Settings.
- Tap on Applications.
- Click 3-vertical dots on the top right corner and select Special Access.
- Select Optimize Battery usage.
- Select Notification History Log from the list and change it to Don’t optimize.
Change 4:
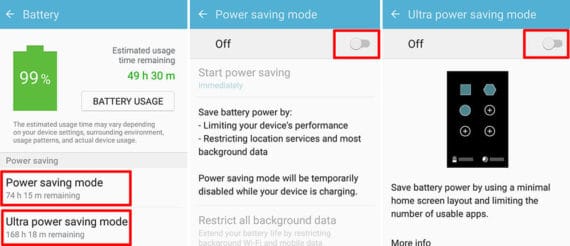
On older version on Samsung devices, you need to disable power saving modes as follows:
- Open phone Settings
- Select Battery.
- Click Power saving mode and turn it off.
- Click Ultra power-saving mode and turn it off.
OnePlus
OnePlus is very popular for its stunning Oxygen OS UI and features. But coming to battery optimization, it has its own limits and disadvantages. You need to make a few changes in your phone settings to stop OnePlus from killing the apps that run in the background.
Here are the most common changes you need to make to prevents apps from killing automatically:
Change 1:
- Go to phone Settings.
- Tap on Apps.
- Click on Gear icon on the top right and tap on Special Access.
- Click on Battery.
- Choose Notification History Log from the list and change it to Not optimize.
Due to a bug in OxygenOS, OnePlus might revert this change randomly anytime. So you need to keep an eye and change it again to “Not Optimize” if it reverts to default sometime later.
One quick solution to prevent this problem:
- Open Notification History Log (or any other app) you wish to run in the background.
- Tap on the recent apps button to see the list of minimized apps.
- Now click on the Lock button on top-right of the app preview.
Once you lock the app, it will keep running in the background and the battery optimization setting will never change to default.
Change 2:
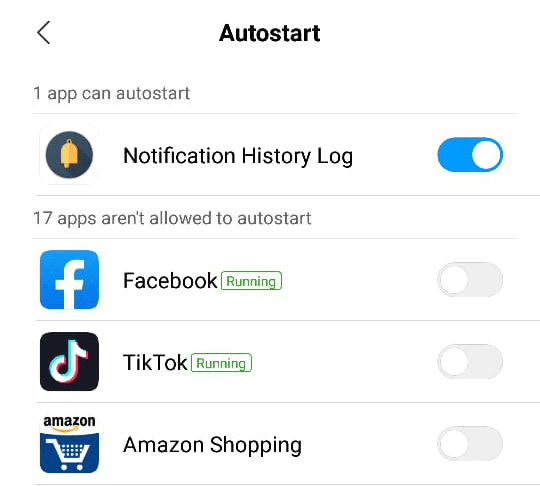
On a few OnePlus models, you need to make sure App Auto-Launch is enabled for your app. To do this:
- Go to phone Settings.
- Tap on Apps.
- Click on Gear icon on the top right and tap on App auto-launch.
- Now enable App auto-launch for Notification History Log.
Change 3:
If you are still facing random killing of app’s background services, try doing the following change:
- Go to phone Settings.
- Tap on Battery.
- Select Battery optimization.
- From the top drop-down menu, change the type to All Apps.
- Select Notification History Log from the list and change it to Don’t optimize.
Asus
In few Asus devices, Power Master app was pre-installed which will automatically kill background tasks when your phone screen is turned off. To make sure your Asus device will never kill the Notification History Log, you need to do the following changes on your device:
- Open PowerMaster application.
- Select Battery-saving options.
- Turn off Clean up in suspend.
- Turn off Auto-deny apps from auto starting.
- Click back and now select Auto-start manager.
- Tap on the Downloaded tab and enable Notification History Log.
Nokia
Few Nokia smartphones come with Power Saver application pre-installed which is responsible for killing apps that running in the background. Unfortunately, there is only a temporary solution available to fix this problem in Nokia devices:
- Go to phone Settings.
- Tap on Apps.
- Select All Apps.
- Tap on three vertical dots menu or gear icon on the top-right corner and select Show system.
- Scroll down to tap on Power Saver application and Force Stop it.
- If Uninstall button is available, you can uninstall Power Saver application to fix the problem permanently. Sadly, the uninstall option is enabled only on a few sets of Nokia devices.
Lenovo
Lenovo mobiles very rarely kill the background apps but there are few Lenovo devices that will instantly kill entire app processes when it is swiped away from running apps. Here is the quick solution for Lenovo users:
Change 1:
- Go to phone Settings.
- Select Apps.
- Choose Notification History Log from the list.
- Tap on Battery.
- Change “Not optimized” to All Apps.
- Again select Notification History Log.
- Change to Don’t Optimize and hit Save/Done.
Change 2:
- Open Notification History Log.
- Tap on the recent apps button to see the list of minimized apps.
- Click on the Lock button on top of the app preview.
Xiaomi
You need to make a few changes in phone settings to stop MIUI from killing the background running apps:
Change 1:
- Open Security App.
- Tap on Permissions. (If you don’t find Permissions option on Security app home screen, it will be inside “Manage Apps” on few models)
- Select Auto-start.
- Now Enable auto-start for Notification History Log.
Change 2:
- Open Security App.
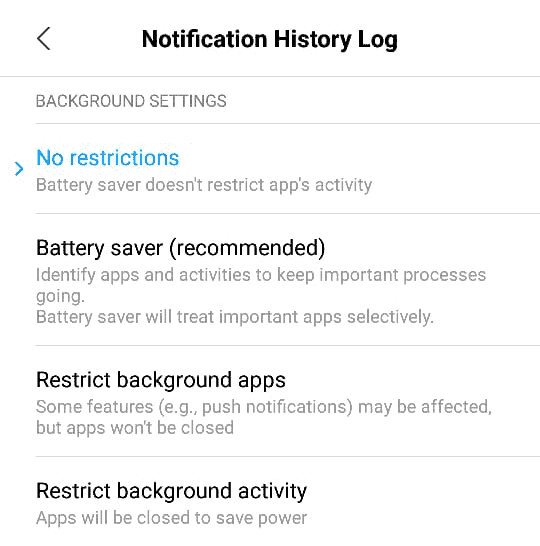
- Tap on Battery.
- Select App Battery Saver.
- Choose Notification History Log.
- Set it to No Restrictions.
Change 3:
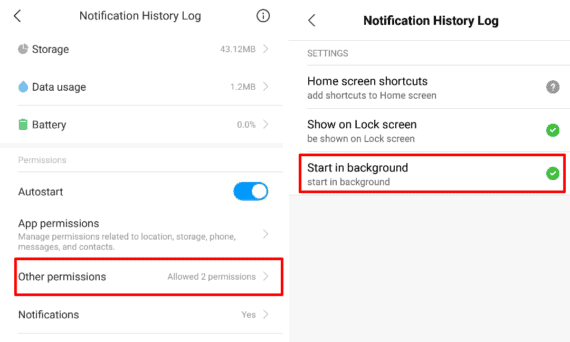
- Open phone Settings.
- Click on Apps.
- Select the Notification History Log.
- Tap on Other permissions.
- Enable Start in background.
Change 3:
- Open phone Settings.
- Select Advanced Settings.
- Tap on Battery manager.
- Set the Power plan to Performance.
Change 4:
- Open phone Settings.
- Select Advanced Settings.
- Tap on Battery manager.
- Choose Protected Apps.
- Make sure Notification History Log is added to list of protected apps.
Change 5:
- Open phone Settings.
- Click on Apps.
- Select Notification History Log.
- Tap on Battery.
- Enable Power-intensive prompt.
- Enable Keep running after screen off.
Change 6:
- Open phone Settings.
- Select Additional Options.
- Tap on Battery & Performance.
- Open Manage apps battery usage.
- Now disable Power Saving Modes.
Bonus: When you click on the recent apps button at the bottom of your screen, drag the Notification History Log app preview downwards to pin it. When you do this, Notification History Log will not be removed when you clear recent apps and background processes of Notification History Log will continue to work indefinitely.
Google Pixel, Nexus, and Other Stock Android Devices
In devices running on Android Pie or higher, make sure you have NOT accidentally enabled background restrictions to Notification History Log.
You can verify it at phone Settings > Apps > Notification History Log > Advanced > Battery > Background restrictions.
![]()
If you still face the problem, try disabling battery optimization as explained below:
- Go to phone Settings.
- Select Apps & notifications.
- Choose Notification History Log.
- Tap on Battery.
- Change the dowp-down value from “Not optimized” to All Apps.
- Scroll down to select Notification History Log.
- Change to Don’t Optimize.
- Hit the Done button to confirm the change.